 |
| Simple and easy 'cafe' style curtains of cotton eyelet |
I've been meaning to get around to sewing these curtains for about 2 or 3 months now, so of course they only took an afternoon to sew, and most of that time was spent oiling and rethreading my serger :)
Most of our windows came with plantation shutters when we bought our house. Plantation shutters are great, they block out the light wonderfully and are easy to wipe down when they get dusty. However, four windows (2 in the master bath, 1 in the office bath and 1 in the laundry room) did not have shutters. Honestly, I've been meaning to make curtains for the bathrooms since we moved in, so... almost 5 years? If you can't tell from this blog, I'm a terrible procrastinator. But, a few months ago I finally found some fabric I liked, then curtain rods that fit the tiny windows, and on Sunday finally had time to sew them. I wanted thin cotton eyelet specifically, so as to let in as much light as possible.
Materials (for four total windows):
2 yards cotton eyelet: on sale ~$5
4 yards cotton eyelet trim, knife pleated: on sale ~$14 (yes, the trim was the most expensive part of the whole project, but I didn't have to do hand knife pleats!)
4 tension curtain rods from Target: ~$12
white thread for serger and sewing machine: on hand
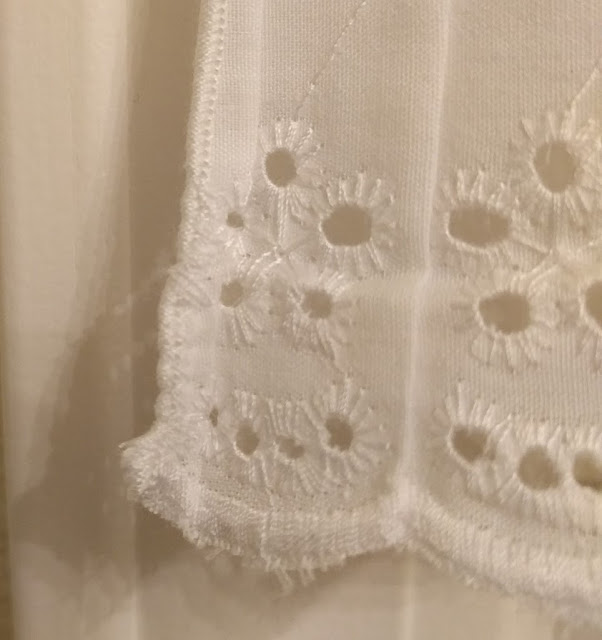
I had 2 yards of an all-over cotton eyelet fabric. I cut it into equal quarters. The selvage edge became the top of each curtain panel.
I applied the trim to the cut bottom edge. If I had thought ahead, I would have applied the trim after cutting the fabric in half the first time, but it didn't make that much of a difference, really. I lined up the trim, cut it to fit, pinned it carefully to the line I wanted to sew and stitched a basic seam on my sewing machine.
After pressing the seam flat, I topstitched the seam so that it would lay flat. For the topstitching, I followed the seamline with the small tooth of my presser foot. I didn't finish the seamed edges beyond a slight trim, because I liked how they looked through the thin eyelet material. Also, since these won't need to be washed often, I'm not too worried about fraying. When I do wash them, it'll probably be by hand.
Once the trim was applied, I added a rolled edge using my serger (a Brother 1034d). I had to re-thread it with white thread, and I found a very helpful youtube tutorial here. It has a good explanation of how the upper and lower looper threads interact which I don't feel is well explained in the manual that comes with the serger.
Note - I also spent a lot of time cleaning lint and thread bits out of my machine and oiling it before serging. The manual says to do this monthly... it's been a while since I oiled my machine, sorry Thing2!
Once the sides were serged, I tucked the remnant serging threads up against the fabric and secured them with a quick zig-zag stitch on my sewing machine.
Last step was to create the channel for the curtain rod to go through, which just involved folding over the selvage edge 1.5 inches and sewing it down.
Et Voila: simple, cheap and pretty curtains!


Beautiful curtains, Sara. From Lindsay
ReplyDeleteThanks Lindsay :) I had fun making them!
ReplyDeleteGreat job
ReplyDeleteYou did pretty good here, loved white curtains. Need to show this to my wife and ask her to make it for our room as well thank you very much will visit your blog again for sure..
ReplyDeleteThe perfect solution i was looking for. I will make it and get back to you
ReplyDeleteThis comment has been removed by the author.
ReplyDeleteThis comment has been removed by a blog administrator.
ReplyDeleteThis comment has been removed by a blog administrator.
ReplyDeleteI’ve learn several excellent stuff here. Definitely price bookmarking for revisiting. I wonder how much effort you place to make any such magnificent. Bridesmaid dresses
ReplyDelete